My SCRAP PACK
a homemade backpack made from bits and pieces I have accumulated
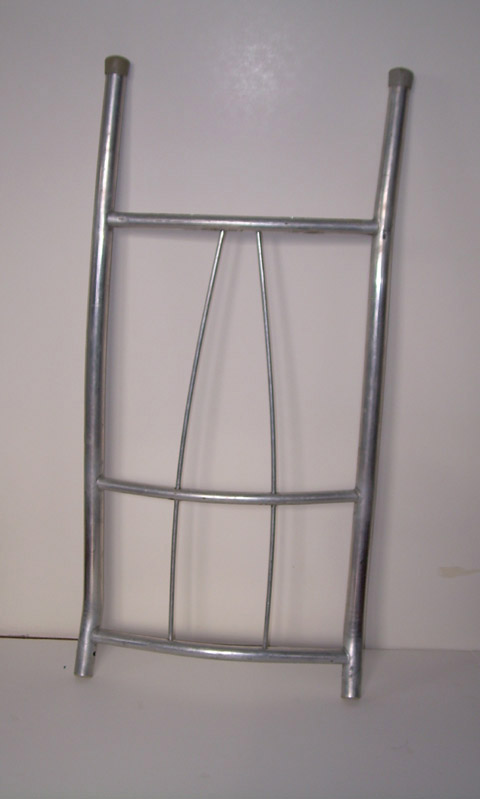 |
| The bare aluminum frame. Weight – 1 lb. 5.5 oz. I bought this frame in the mid-1960s when I was an Explorer Scout. Other packs have come and gone but, for some reason I’ve kept this frame all these years, planning to do something with it someday. |
 |
| The frame with the original shoulder pads and canvas back panels. There was no sternum strap or hip belt. |
 |
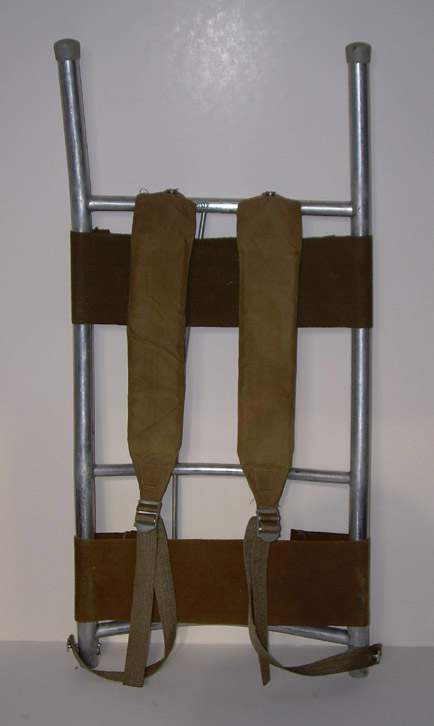
| I replaced the shoulder pads with a new pair (which included a sternum strap) I found in a hiker box. The nylon straps attaching the bottom of the shoulder pad to the frame are the originals. I made the hip belt out of salvaged and scavenged material and parts and sewed it to the original canvas back panel. Weight of frame with new shoulder pads and hip belt – 2 lbs 4 oz. |
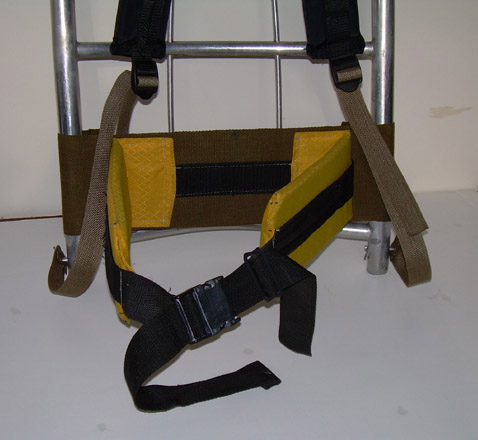 |
| Closeup of the hip belt. The belt is a 1 ˝" nylon strap which, in its previous life, was a wrap-around handle of a duffle bag that had seen its better days. I scavenged the front buckle from a damaged suitcase that had been dumped on the shoulder of a road. The material encasing the padding is PU coated polyester from an old shower curtain. The padding is ˝" thick closed cell blue foam that I found in the trash. |
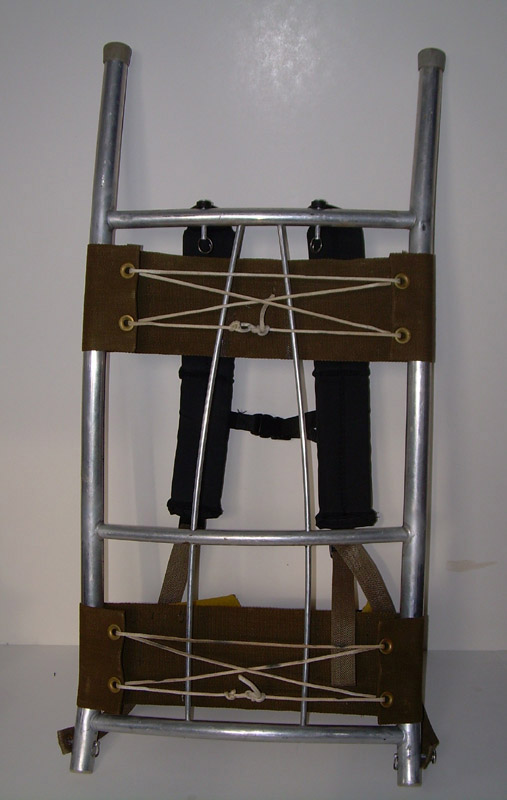 |
| Back of the frame. The canvas back panels were in good shape, so I reused them. Leno mesh would have been better, but I didn’t have any. They can easily be replaced if I chance upon some mesh someday. |
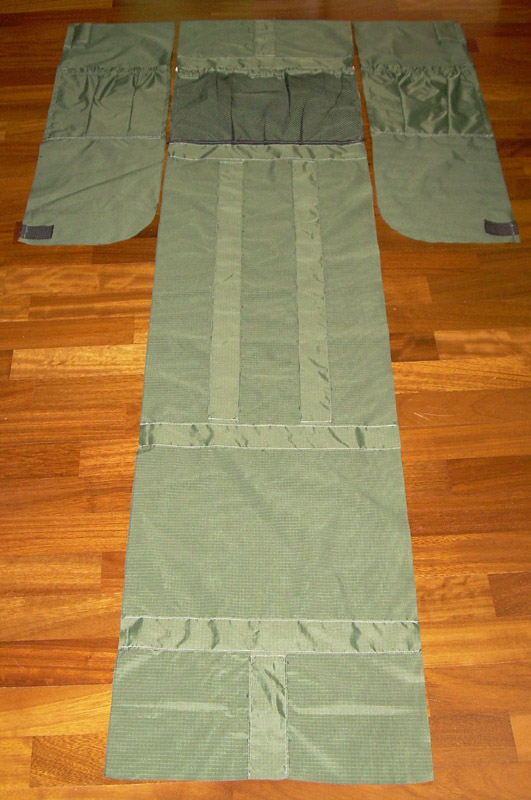 |
The fabricated side and front, bottom, and back of the pack before assembly. (I had also made an extension collar but it didn’t fit nicely in the photo so I left it out.) To make the pack, I used about two yards of fabric which I had purchased some time ago for $1.00/yd at Walmart. As near as I can tell, it is 70D ripstop nylon with a light PU coating (weight, including PU coating, approximately 2.6 oz/sq.yd.).
Heavier material for the bottom would have been nice but I was working with what I had. To compensate, I tried to reinforce critical areas with additional strips of the fabric. The short vertical strips (at top and bottom) provide reinforced attachment points for the top strap. The horizontal strips provide reinforcement for the compression straps. The purpose of the long vertical strips in the center (which wrap around the bottom of the finished pack) is to strengthen the bottom of the pack where the downward pressure of the load is highest. (Whether they will fulfill that purpose, I don’t know.) |
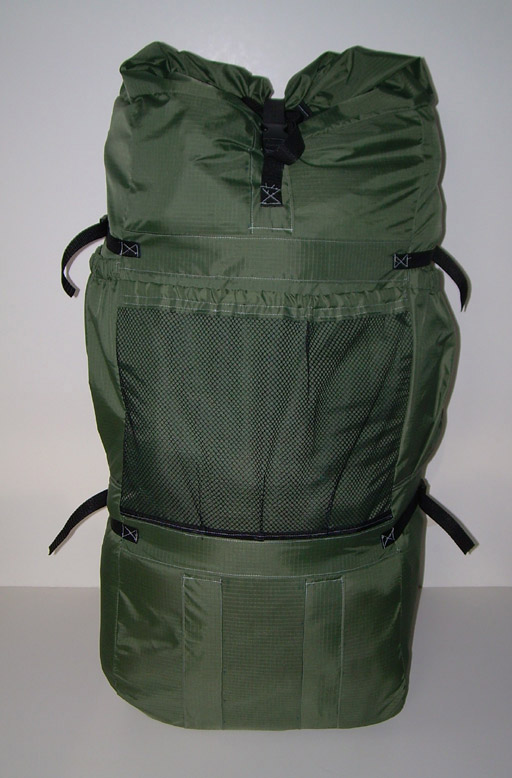 |
| Although this is an external frame pack, I wanted to avoid the need to attach gear directly to the frame. So I made the pack as big as the frame – 30" tall, 15" wide, and 9" deep. After deducting the radius on the bottom-front of the pack, the pack volume (as near as I can figure) is 3930 cubic inches. There is one external pocket located about halfway up on each side and a mesh pocket on the front. Total weight of frame and pack – 2 lbs. 14 oz. |
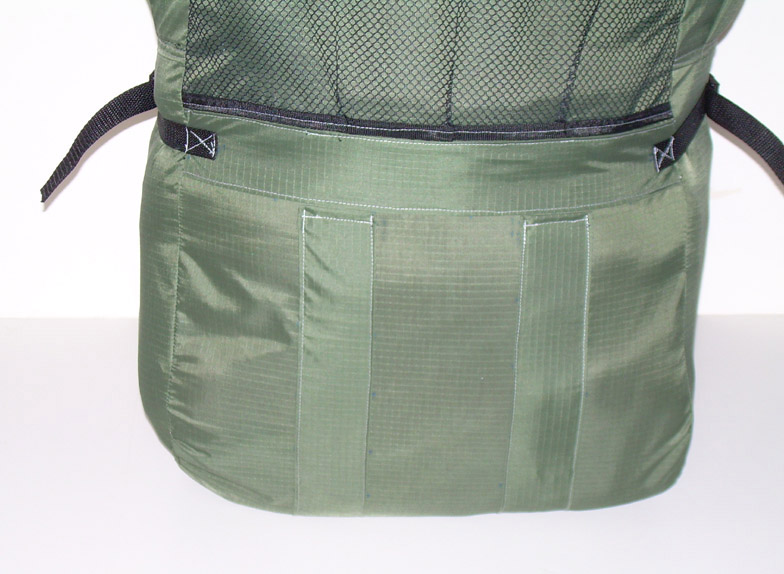 |
| Closeup of bottom-front of the pack.. |
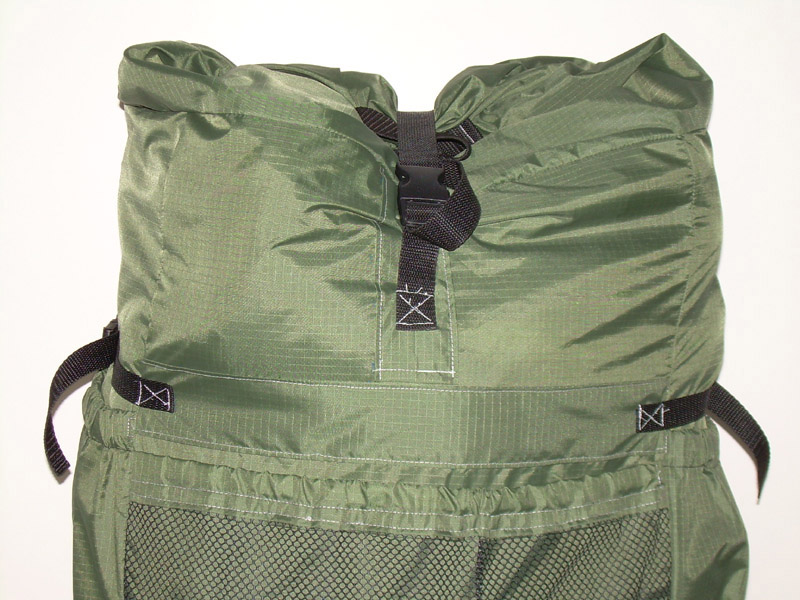 |
I got the mesh for the front mesh pocket from the back of a folding stadium chair. The elastic in the top of the front mesh pocket (and side pockets) was purchased at a thrift store for 25 cents. The buckle on the top strap and part of the nylon strap came from an old shower curtain (the same one I used to make the hip belt pads) . The rest of the top strap was a scrap I had lying around.
I saw no need for a lid. Instead, I added a 9" high extension collar. It gives me 1000-1200 extra cubic inches if I ever need it. But, mostly, it’s just intended to be a substitute for a lid – cinch it, roll it up, and secure with the top strap.
|
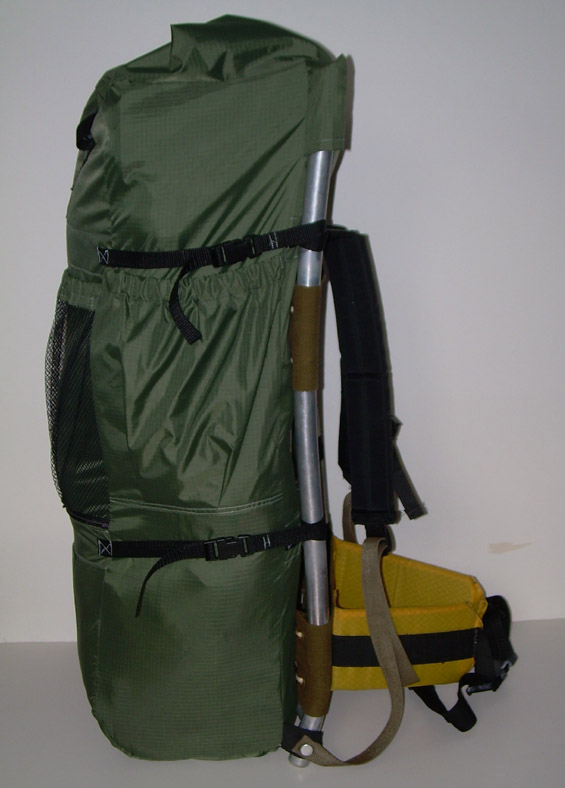 |
| Side view of the finished pack.. |
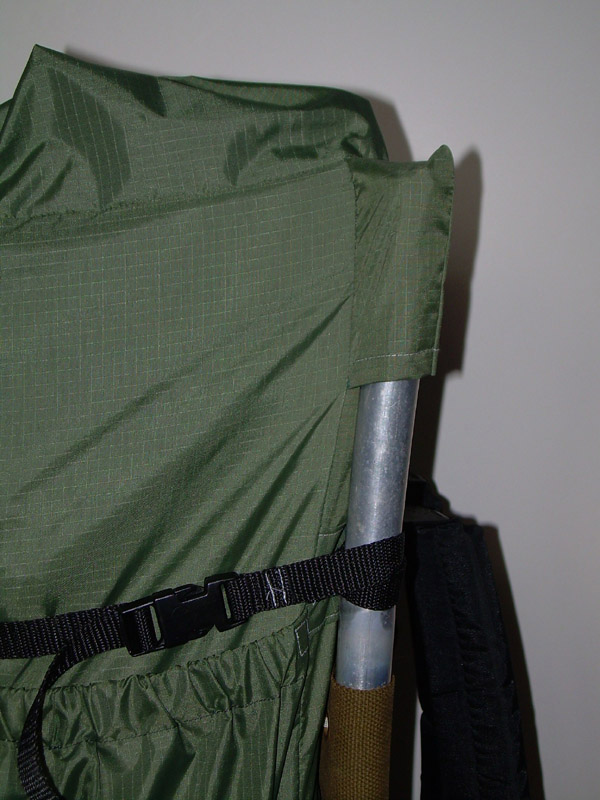 |
| I made tubes out of three layers of fabric, sewed one end of each tube closed, then sewed one side of each tube into the back-side seam at the top of the pack. The tubes slip over the prongs extending upwards at the top of the frame. |
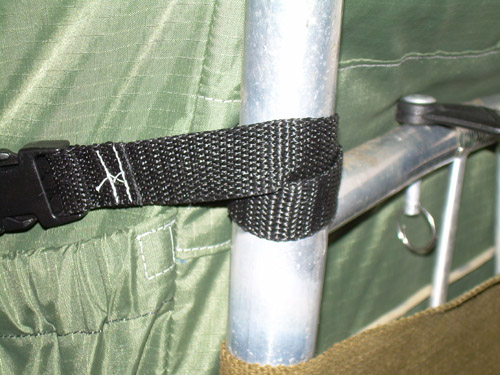 |
| The compression straps serve several purposes. Besides the obvious one (horizontal compression), they are positioned so they can be wrapped around the frame 1 ˝ turns just above the cross bar. This not only allows me to snug the pack to the frame but also keeps the pack positioned correctly and transfers some of the downward load to the frame. |
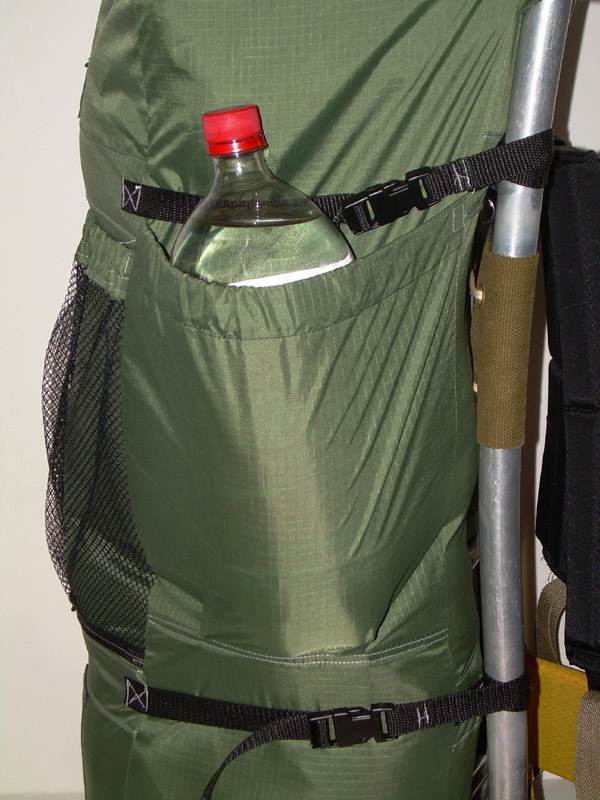 |
| The side pockets are located about midway up the pack. Since I usually use side pockets for carrying water and alcohol for my stove, this gets the weight higher up on my back. The side pockets are large enough to hold a two liter bottle or two one liter containers. Ripstop nylon was used for the side pockets primarily because I didn’t have any more mesh. But that’s okay – they are less likely to snag. |
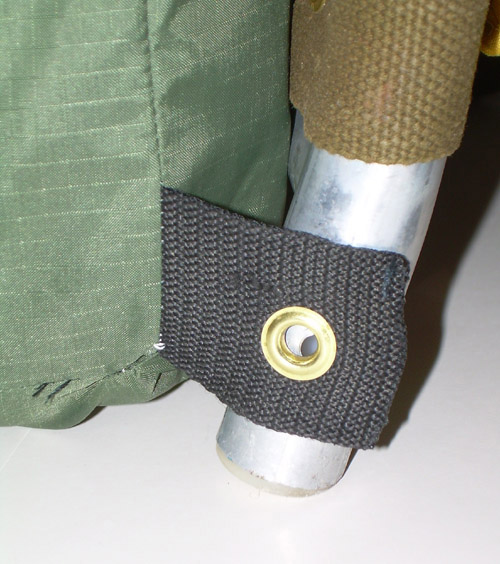 |
| I made the bottom attachment points out of short pieces of 1 ˝" nylon strap (the same strap that was used to make the hip belt) through which I installed a 1/4" I.D. grommet. This locks the pack onto the frame, using the same pin that attaches the shoulder strap to the frame. (Without it, the pack could slip off upwards). |
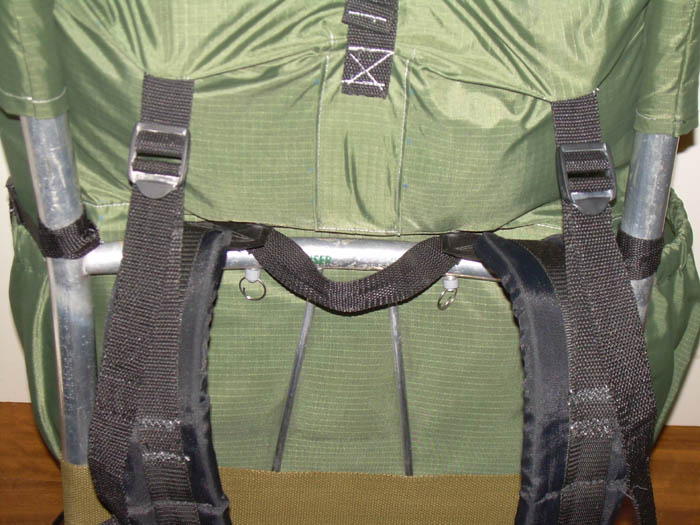 |
| I currently have about 100 miles on the pack. My pack weight for the last 75 miles has been 35 pounds. I decided there was no need for load stablizers on the hip belt. However, I concluded load lifters and a haul loop would be an improvement, so I added them. |
The hip belt was attached to the lower back panel (instead of the frame) which caused the back panel to ride up on the frame. The result was to shorten the torso length, changing the fit of the pack. To solve this problem, I ran a loop of paracord through the gromments on the lower edge of the back panel and around the lower cross bar on the frame. This holds the hip belt in position and allows infinite adjustment for different torso lengths. Other than that, the pack is holding up well and carries fine. |
Confident that the pack would do the job, I took it to the Applachian Trail for a 150 mile hike. I wanted to do the hike without resupply so my starting weight, which included 10 days of food, was 45 pounds. Several days into the hike, the stitching that attached the hip belt to the back panel began breaking. It wasn't strong enough to handle the stress loads caused by the weight coupled with the constant jarring. Eventually, the stitching failed altogether and I spent the last several hours of the day carrying all the weight on my shoulders. That evening, after making camp, I pulled out my repair kit and resewed the hip belt to the back panel by hand. Originally, I had used size 46 thread. The thread in my repair kit was size 92 (much stronger). That did the trick and I had no further problems with the pack for the remainder of the trip. |
|